Edit an Item in MyEPOS
Instructional guide for amending an existing product in MyEPOS
1. In program mode choose “Item Setup”

2. Search by name or barcode for your existing product.

3. Choose the item you wish to edit from the list.
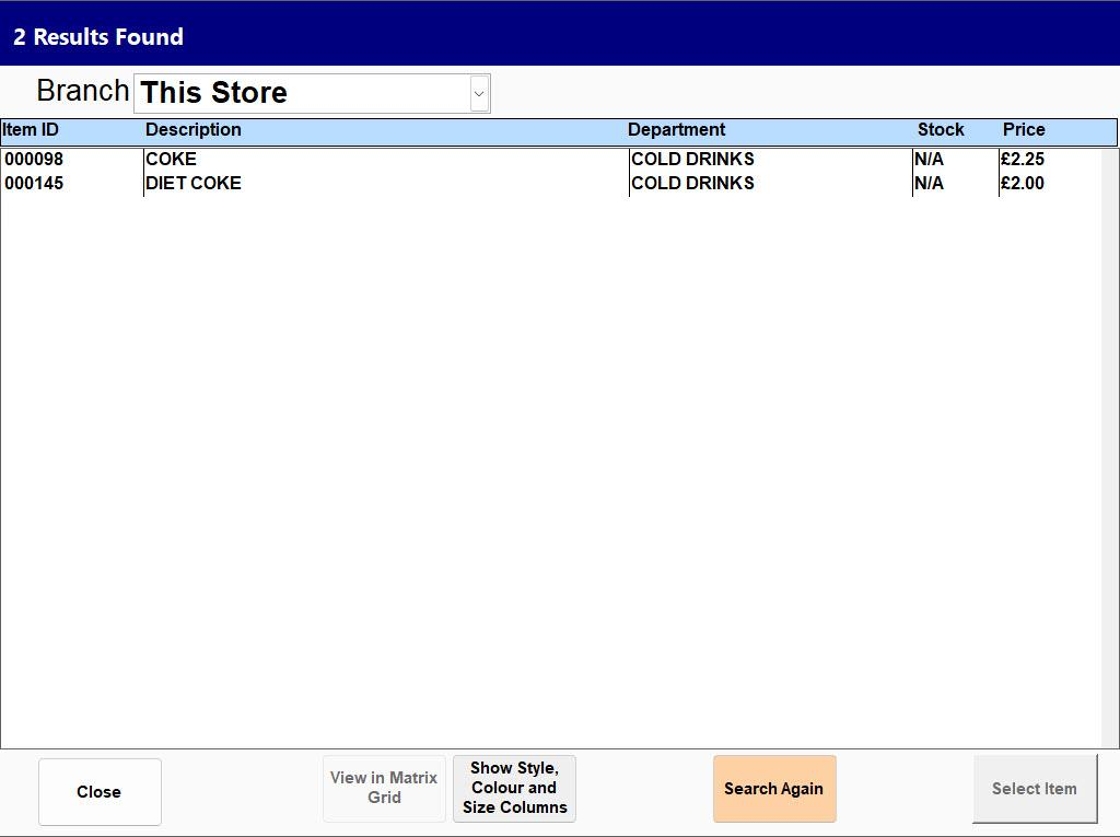
4. In “Name” enter the name of the item
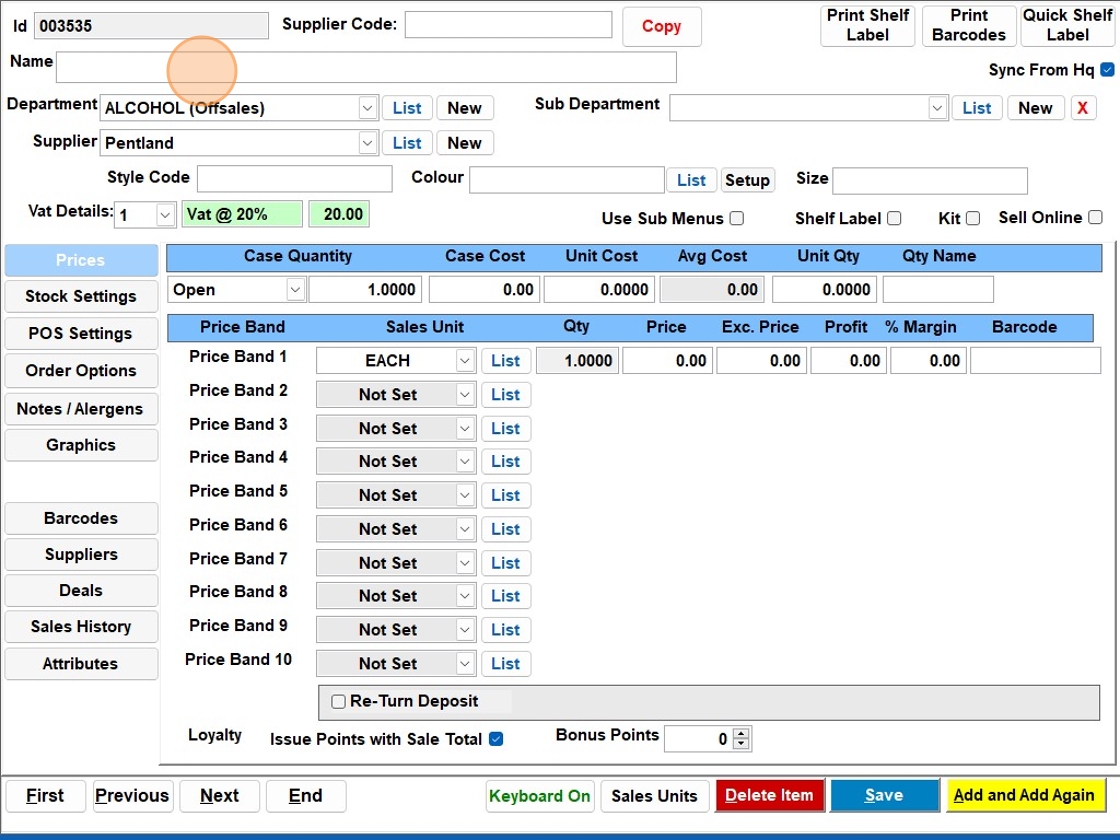
5. Choose the appropriate department.
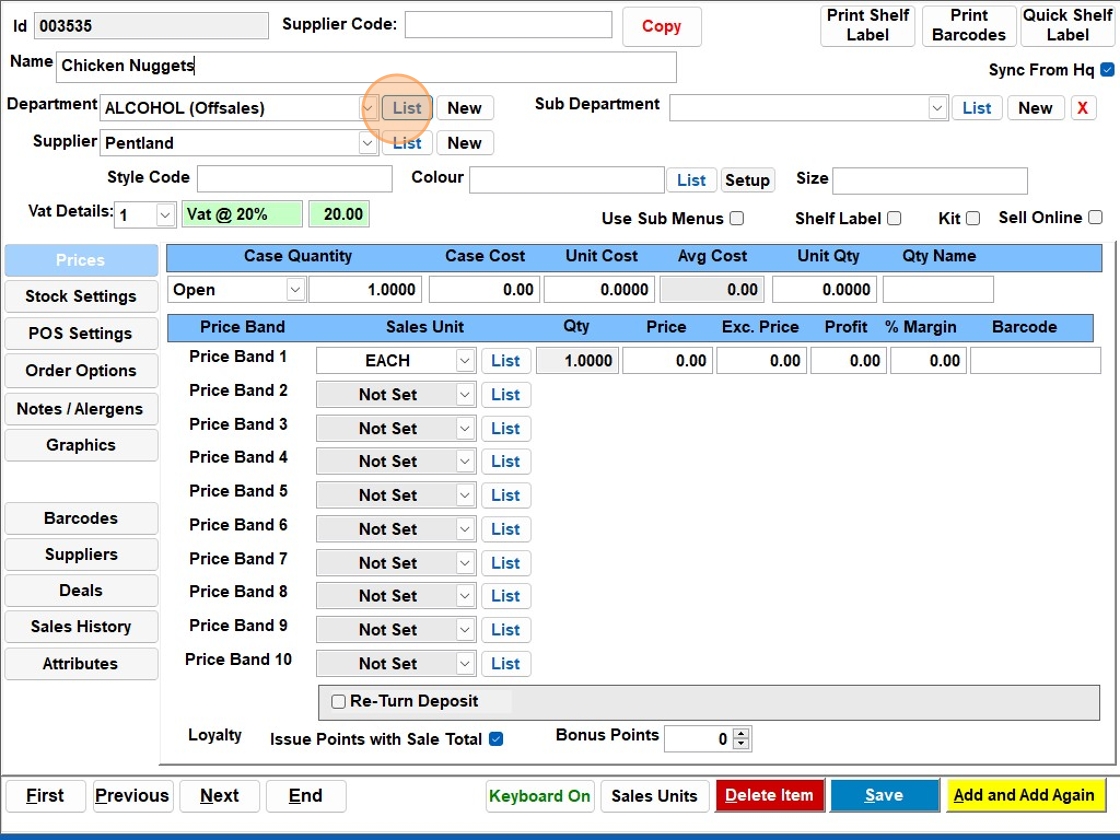
6. Choose the supplier (if applicable)
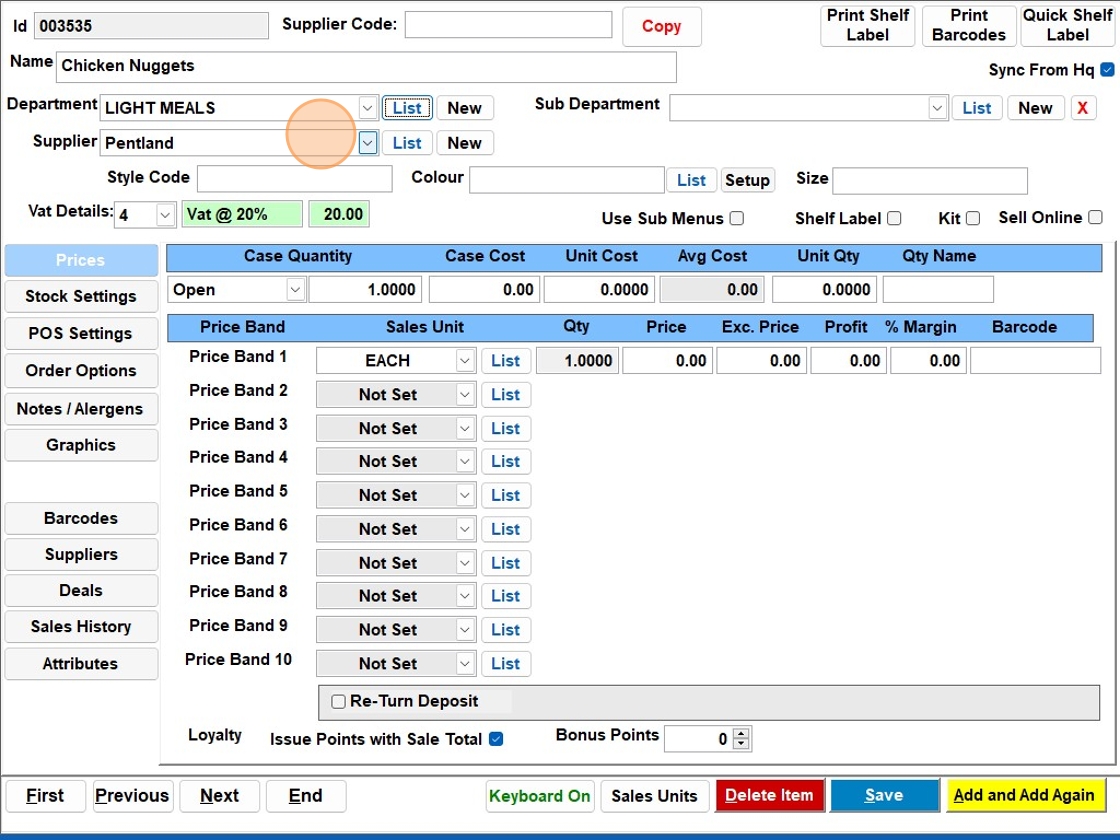
7. Click the “Price” field and enter the price for the item
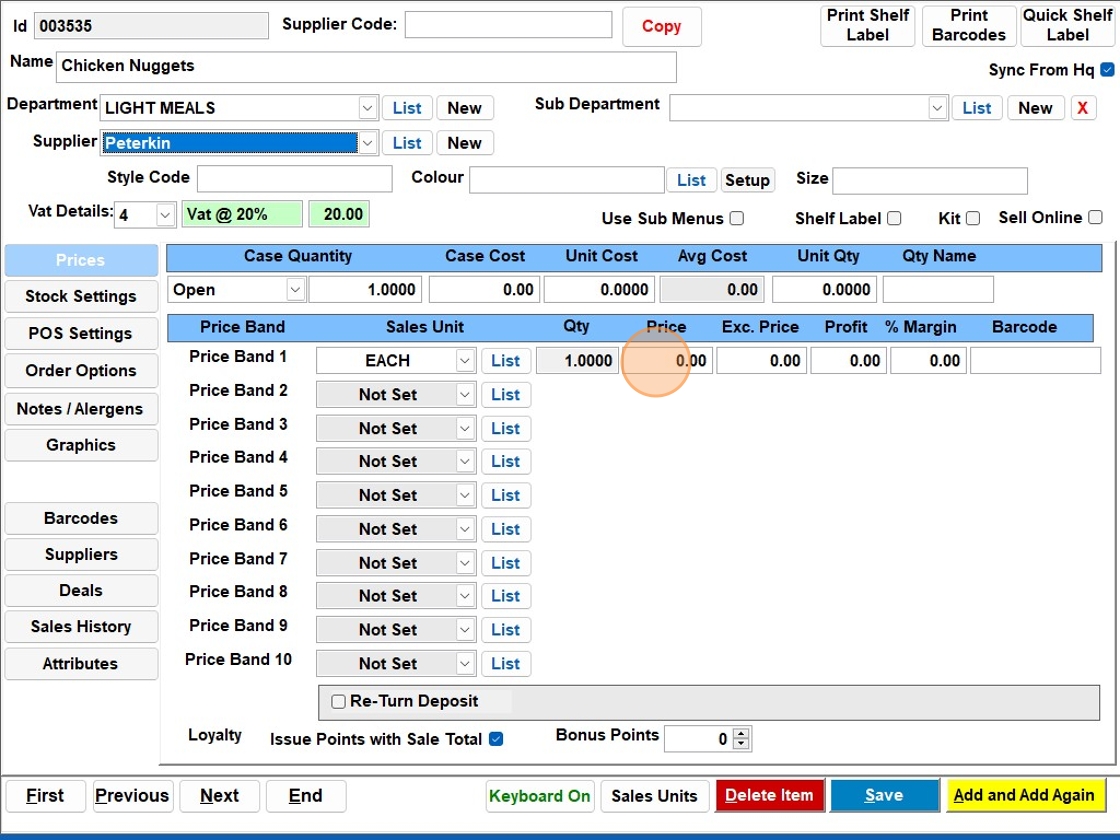
8. You can amend the sales qty here or add additional ones
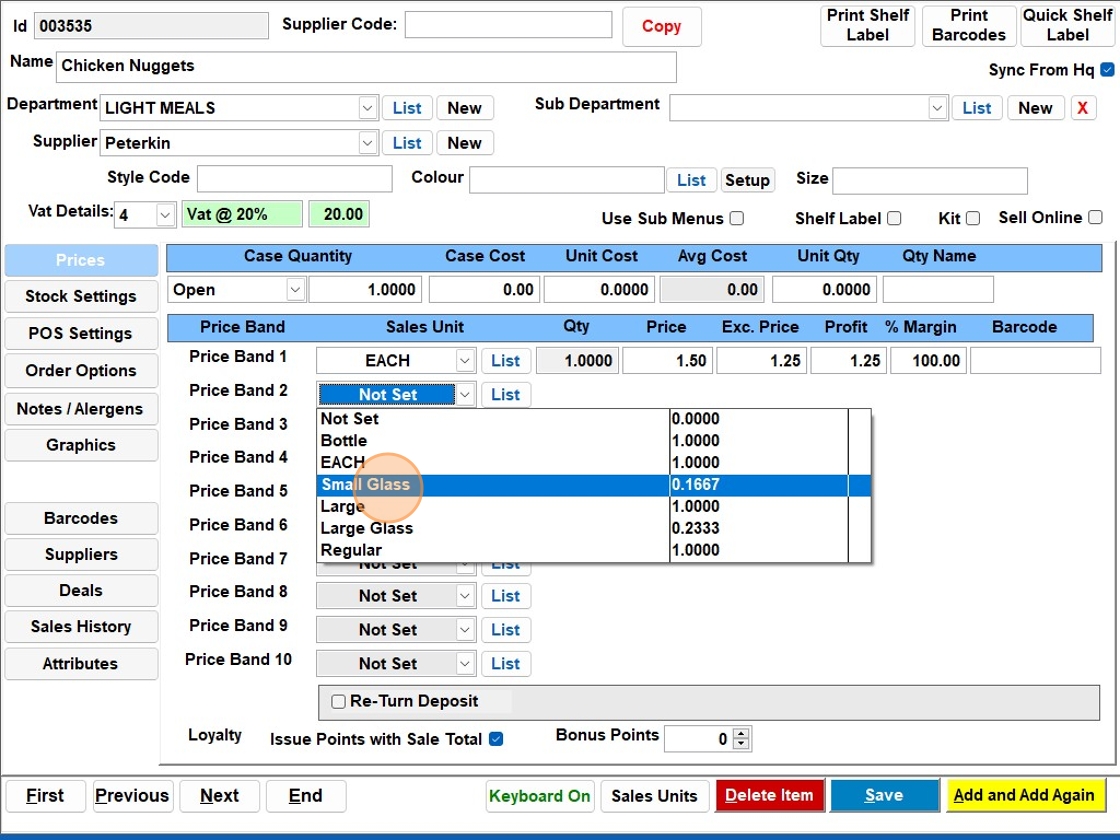
Tip: You have now created a simple item and it will be good to sell!
The below steps are additional customisations that you may require.
9. Stock Settings

10. With “Calculate Stock” selected the system will track the stock of your item.

11. POS Settings

12. Price Shifts:
This is where you can set any specific price shifts for the item. Please see guide on price shifts for additional resources.

13. Questions:
This is where you can set any questions for the item. For example, “Is the customer over 18?”

14. Disable Product:
With this ticked the product will not appear on any menus on your system.

15. Course Product:
With this ticked the product will be marked as a course item (ideal for products linked to others).

16. Indicate VAT:
With this ticked the product will show a VAT breakdown when sold.

17. Disable Product:
With this ticked the product will sell as a weighted item.

18. Always Print Scale Label:
With this ticked the product will print a scale label every time it is sold.

19. Print Ticket:
With this ticked the product will print a ticket every time it is sold.

20. Generate GS1 Barcode:
With this ticked the product will generate a GS1 Barcode for the sale of the product.

21. Always Prompt for Price:
With this ticked the product will ask you to enter a price every time you sell it. (Ensure no price is entered in the main product record.)

22. Negative PLU:
With this ticked the product will sell as a negative figure.

23. Disable Discount:
With this ticked the product will be unable to be discounted.

24. Exclude From Promotions:
With this ticked the product will be excluded from any promotion.

25. Click “Order Options”

26. Order Prompts:
Here you can select any order prompts you wish to show when the item is sold (e.g., steak cooking).

27. Kitchen Printing:
Here you can select which printer the item should print on when sold.

28. Notes / Allergens

29. Allergen Table:
Here you can select any allergens for the item.

30. Notes on Item:
Here you can add any notes for the item and choose if they are displayed to the staff or on the TFT Display.

31. Comment 1:
Here you can enter any relevant information (e.g., for a WordPress integration, you might enter the product SKU to link systems together).

32. Graphics

33. Here you can add any images for the item. You have a choice of:
– Button Image: Graphic displayed on the keyboard.
– Item Image: Image displayed on the main till system when the item is sold.
– TFT Image: Image displayed on the TFT customer display when the item is sold.

34. Click “Save”

Leave a Reply